Saturday, May 22, 2010

Lasagna, step by step.

The other day I decided to make something I haven't cooked in ages. Why? I need variety. In an effort to be super careful about what I eat and lose a few extra pounds, I've been making the same healthy stuff over and over again. It's easy, but getting mundane.  So I decided to drag something out of my repertoire and find a way to make it a bit healthier.  I found some good fresh lasagna noodles at the grocery store, so that's what I decided to make. 

Step 1, make the sauce. It's totally easy to buy a jar of sauce, and definitely quicker, but I'm a bit of a control freak, and I like knowing exactly what goes into my sauce. Plus, I can keep it healthy that way. . . I  wanted a substantial, filling sauce so I went with turkey sausage and mushrooms. Filling and delicious, with lots of good stuff inside.


So there we have it. Ingredients in my sauce before and after I decimated them with my awesome knife skills.  The herbs and spices are fennel seeds, pepper flakes, salt, black pepper, basil, and oregano.  I've had a couple of people ask me to be more specific on my measurements, and I'm going to work on that, but I don't really measure things when I cook.  I know what I love, and I taste as I go.   But like I said, this is supposed to be all instructional, so I'll work on measuring.  But generally, if you don't like something I use, leave it out. If I use too much salt (and chances are, I do) cut it back.

Back to the sauce. . . Once I had all my pretty pretty ingredients sliced, diced, and ready to go, it was cooking time.  First in the pot were the turkey sausage (remove the casings) and the onions. I kinda let the fat render out of the turkey sausage and used that fat, plus a scant drizzle of olive oil to cook everything else. It worked pretty well. 


After the sausage and onions were cooked, I added the mushrooms, spices, and garlic, then cooked them  till everything in the pot (including the bottom of the pot) was golden brown and magical.  Once everything hits that point, it's time to start the deglazing process.   For those who don't know, deglazing involves adding liquid to a pan to help scrape the flavorful golden brown stuff off the bottom of the pan.  In this case, I added tomato paste first--and had a little fun with it while  I was at it--tomato sauce looks like blood. Ha ha. then some red wine vinegar, and the 2 cans of good quality tomatoes I had.


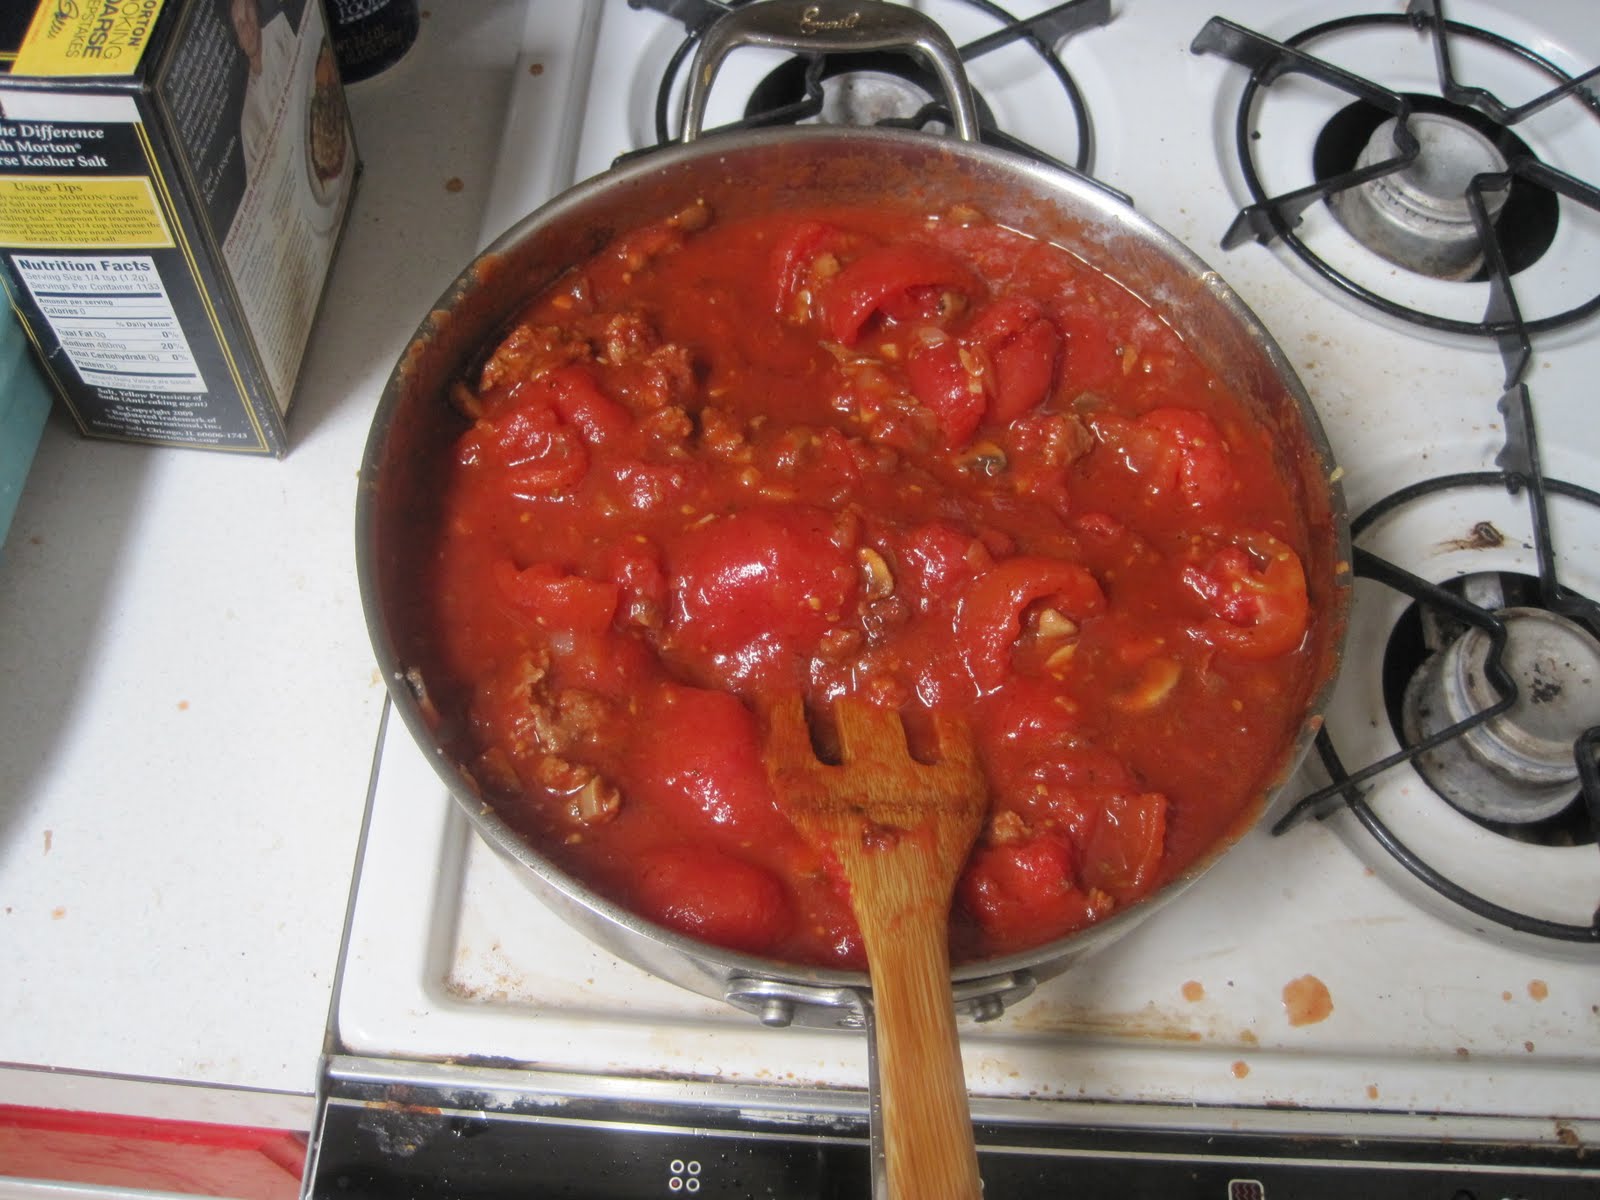
I broke up the tomatoes and left them to simmer for a while. . . because a good tomato sauce just can't be rushed, and you need time to let all the flavors work in the pot.   I probably gave it about half an hour, mostly because I was doing other things, like folding the epic amounts of laundry I have, and washing dishes so I wouldn't have to do it later.   Once the sauce was cooked down to my liking (How can you tell if it's to your liking?  You taste it. I'm constantly tasting, every step of the way.)   Once the sauce was thickened, flavorful, and bubbling (See?) I added some fresh parsley and blended the whole thing with a stick blender. If you don't have a stick blender, you can pour the sauce into a blender or food processor, or even mash it all with a potato masher. I use a stick blender because it's easy, but that doesn't mean there aren't other less technologically advanced ways to do things.


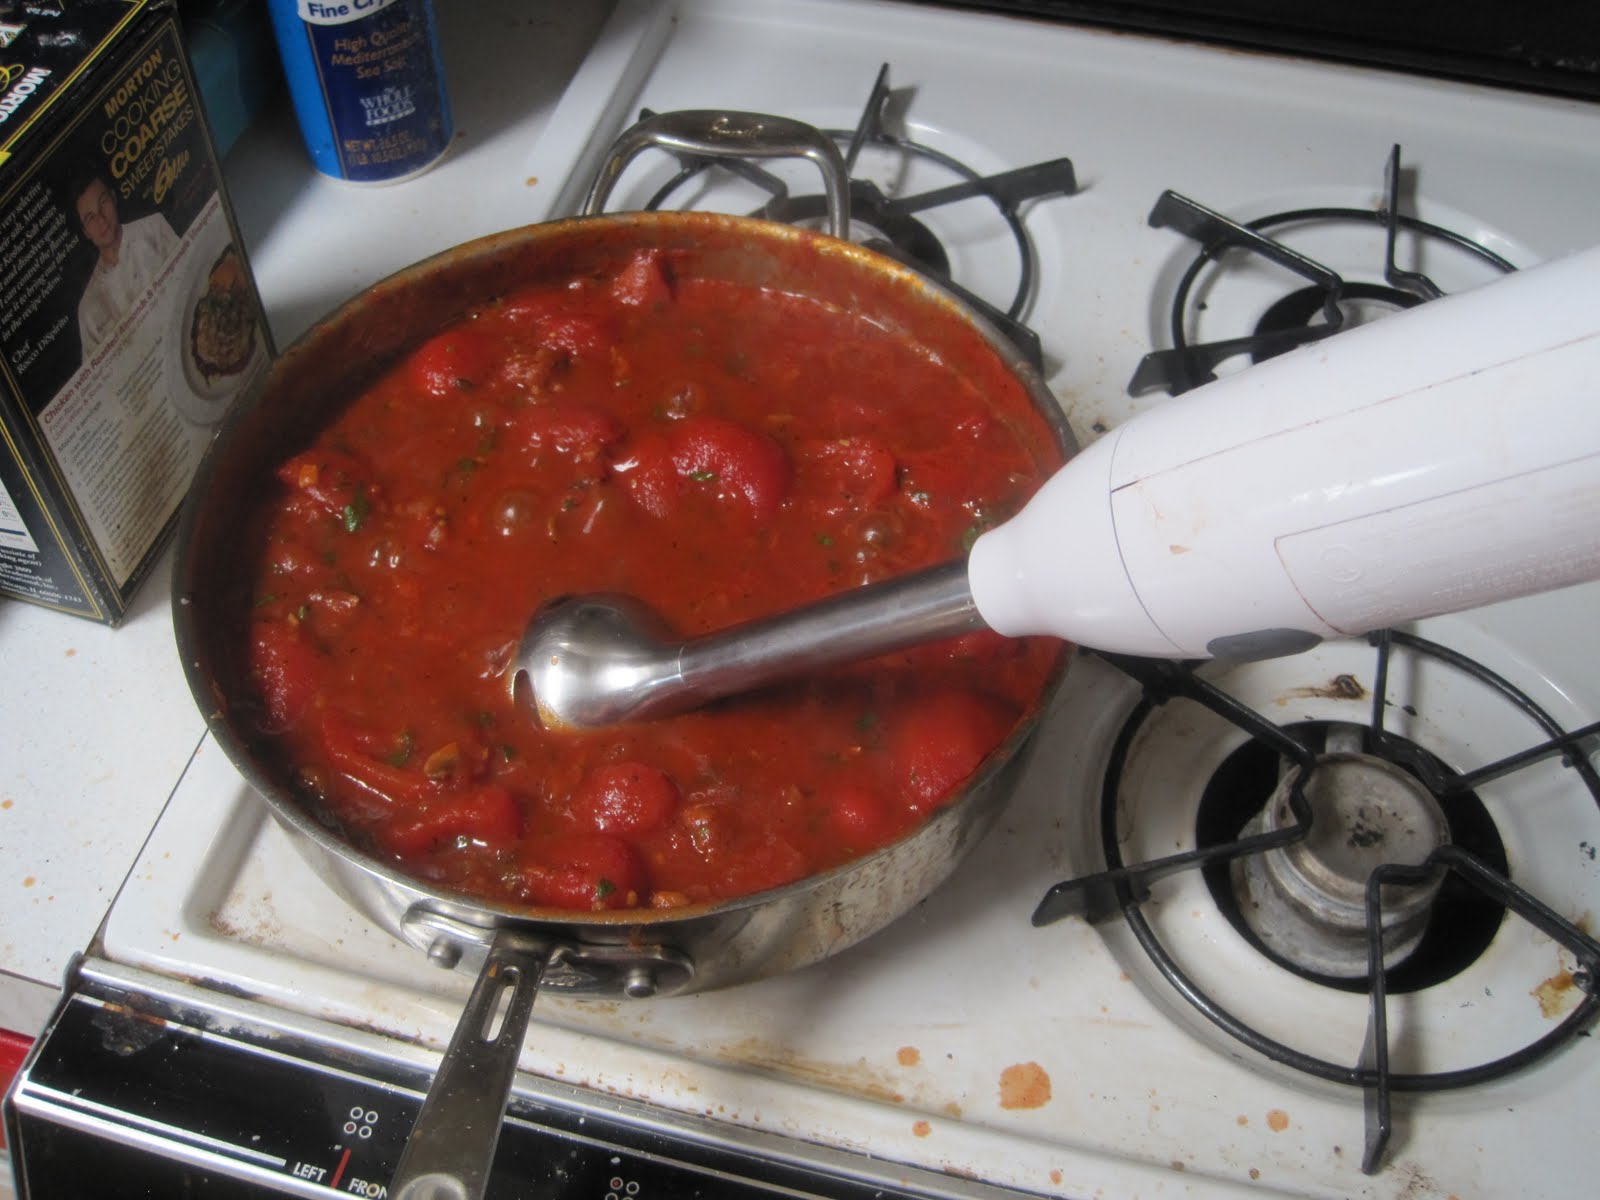
The final sauce--Meaty, thick, and flavorful.  So once the sauce was done, it was time to move on to the other parts of the lasagna. It's a multi step process.  For a lot of my life I didn't do lasagna--I have this thing about cheese-- but I found that a mixture of good low fat ricotta, eggs, and a bit of Parmesan, and lots of yummy seasonings. In this case, I used salt, pepper, and a bunch of nutmeg.  There are a few different ways to do the filling. I went with your basic dump and stir- threw all the ingredients into a bowl and stirred them together. Very simple


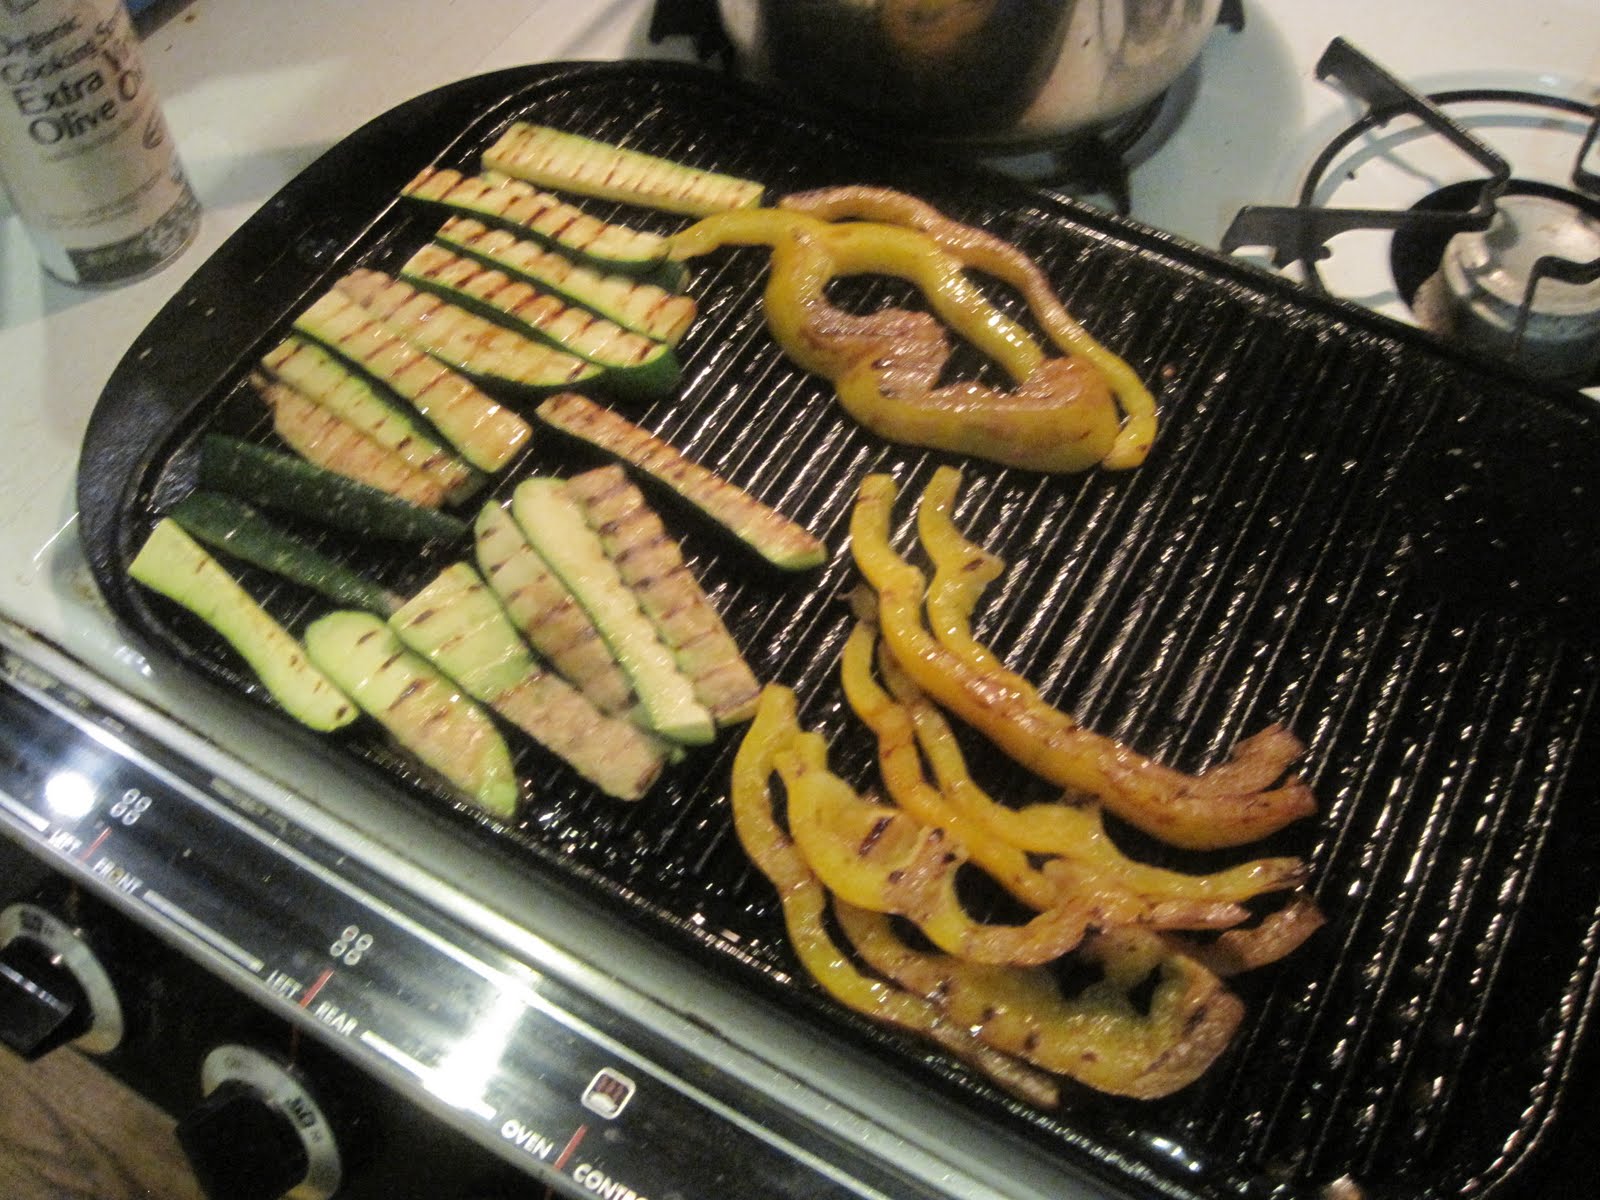
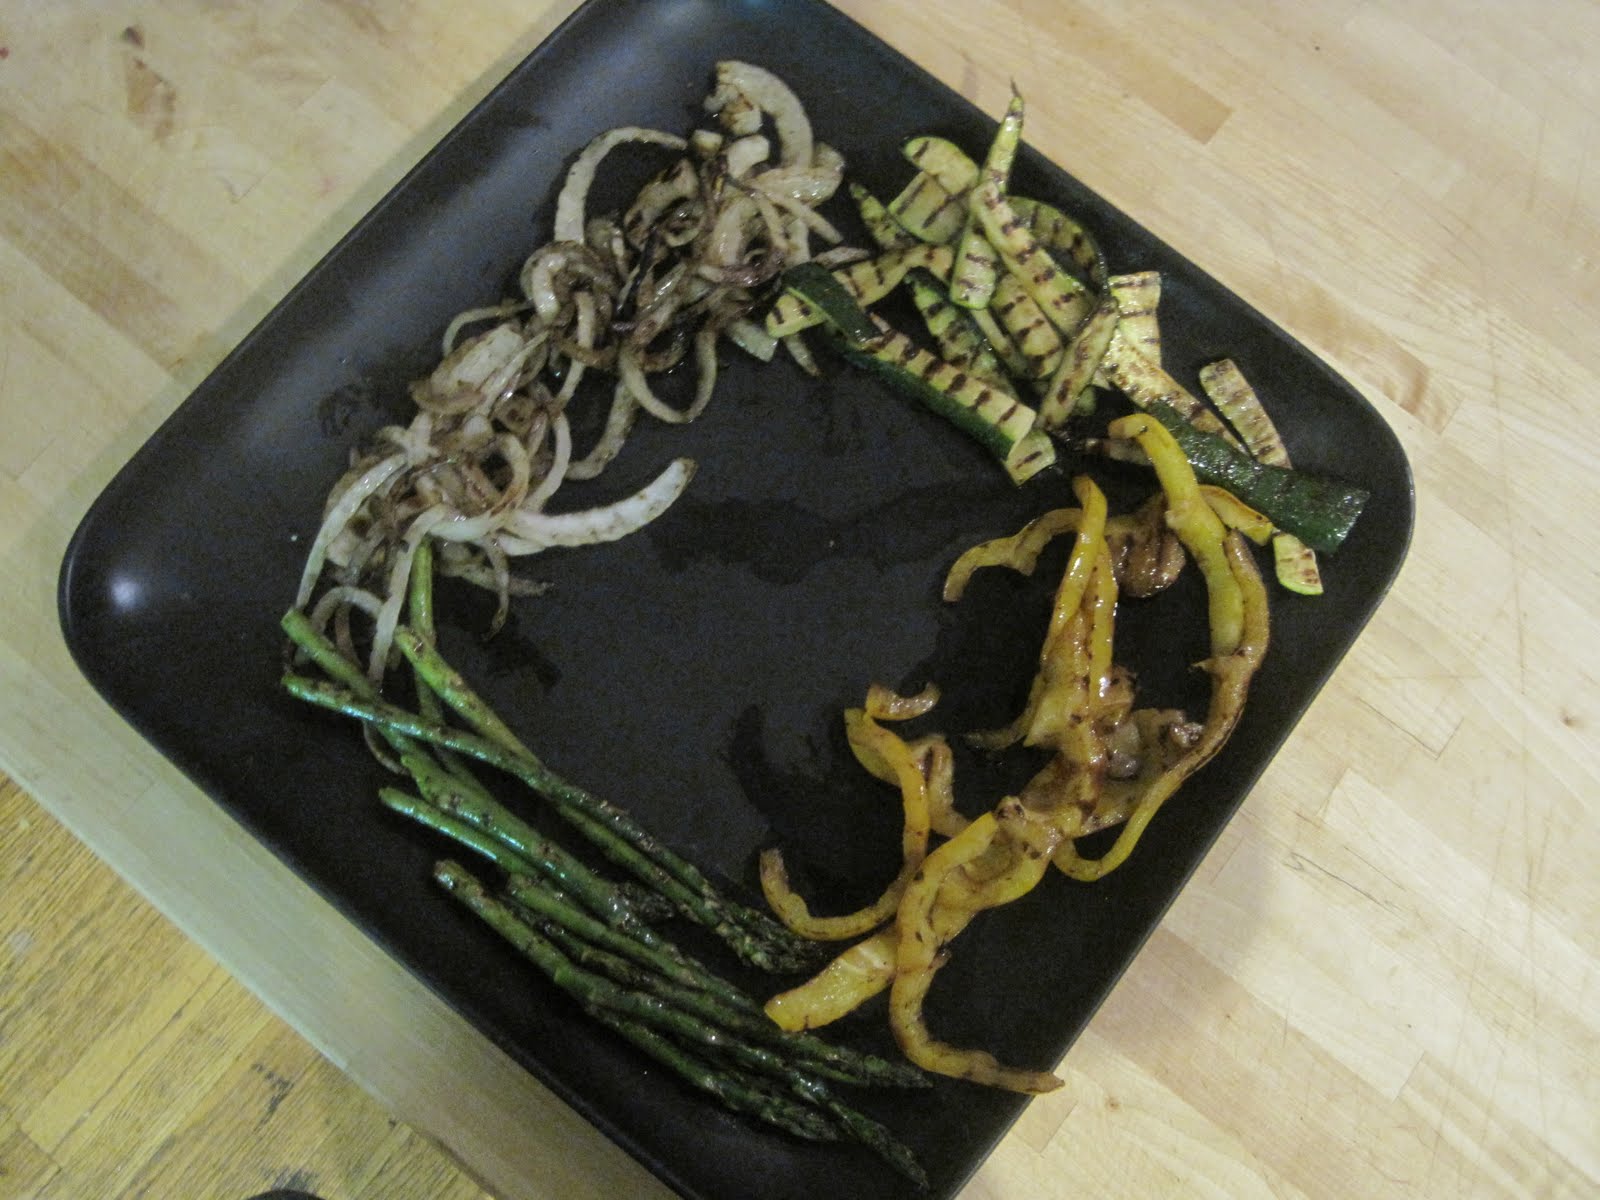
Of course, I tasted it after seasoning, and seasoned again.  It is important to remember that seasoning comes through better when hot than cold, so if things taste almost perfect, you're probably there.  With filling and sauce done, it was time to move on to the next step. I'm a huge eggplant fan, so I opted to use eggplant in with the pasta. Sliced super thin and seared, it does a good job adding flavor and working as a pasta substitute.  I used the eggplant instead of about half of my pasta.  It cut the calories for sure, but it was more about the flavor.

So for eggplant prep.  I slice them thin, salted them liberally, then weighted stuff down to draw out the moisture.  Eggplant browns up better if there isn't as much moisture in it, plus it tastes better. Wipe off the salt before cooking or you'll have some damn salty eggplant though. It makes sense to do the eggplant in small batches, and not overcrowd the pan.  I used a little bit of olive oil to lube up the pan.


With the eggplant done and hanging out on paper towels, I parcooked the pasta.  This way it didn't absorb too much moisture when cooking in the lasagna. That just gets messy.   To parcook, I cooked the sheets in small batches for 1-2 minutes, then rinsed each one under cold water, and laid them on towels to dry.  Totally time consuming, but an important step when using fresh pasta.  An alternative is using that no-cook dried lasagna pasta they sell.  That works too. I like the texture of fresh. It's a personal thing.


With all the ingredients cooked and ready to go it was time to assemble the lasagna. Ok, first preheat the oven to 350, then assemble the lasagna.  I lightly oiled a baking dish I used foil here. There's no culinary reason for this whatsoever. My good pan was dirty.   Assembly is all about layering.  I put just a teeny tiny bit of sauce in the bottom of the pan (The pasta will absorb most of it), then pasta, then a layer of cheese, then eggplant.  For the next layer I added more sauce, then rinsed and repeated--Pasta, cheese, eggplant, and more sauce. 


I topped it off with a mixture of Parmesan and mozzarella, covered the whole thing in foil,  cooked for 30 minutes, pulled the foil off and cooked an additional 20-30 minutes until the cheese looked magically delicious.   Y voila! Lasagna. I let it sit for about 20 minutes before cutting it. Why? I'm kinda operating on the same principles I do when cooking meat--letting it rest helps the juices to reabsorb.  And the lasagna was beautiful when finally cut into. 


What does a single girl do with a big ass tray of lasagna like that? Well, I shared some with friends, but the rest got portioned out and refrigerated or frozen. Lasagna is one of those foods that, like fine wine seems to get better with age.  I've been enjoying reheated lasagna, topped with a little extra sauce  all week. There's still one slice left. YUMMMMMMM.  I particularly enjoy the crunchy little end bits, and have been selfishly keeping the corner pieces for myself, even when sharing the rest with friends. 

Sunday, May 16, 2010

Cooking Healthy

Not too long ago a friend of mine showed me a cookbook she had from probably about 1950.  The food was pretty much basic Americana, but what really stood out were the cute (and I say this with all the sarcasm I can muster) little "helpful hints for housewives."   Most of them were pretty lame, but one that actually stood out as making sense is having one or two reliable meals for when you have guests over.  Now I obviously wasn't cooking to impress my husband's boss or anything, as I'm very much not married, but I had a friend over for dinner.   I wouldn't say I really have standard meals. I'm good at cooking, and I get creative.  But I took inspiration from the 1950's and made a simple pretty meal that works well for company--Roast Chicken, Grilled Vegetables, and Mashed Sweet potatoes.

First, the chicken. Who doesn't like a nice roast chicken?

Preheat the oven to 450°F. Rinse the chicken, then dry it very well with paper towels, inside and out.

Salt the cavity, then truss the bird. Trussing is not difficult, and if you roast chicken often, it's a good technique to feel comfortable with. There are plenty of good instructions to be found via google. I'm not going to bother. When you truss a bird, the wings and legs stay close to the body; the ends of the drumsticks cover the top of the breast and keep it from drying out.  Trussing helps the chicken to cook evenly, and it also makes for a more beautiful roasted bird.  I was out of twine so I disloacted the wings and tucked them under the chicken, then used a piece of the flappy skin at the end of the bird to tuck the legs into. Creative chicken bondage! 


Now, salt the chicken— I use a lot of salt, but if you aren't a salt fiend like me, or if your blood pressure is high, you can salt it much less.  When it's cooked, you should still be able to make out the salt baked onto the crisp skin.


Place the chicken in an oven proof saute pan or roasting pan and, when the oven is up to temperature, put the chicken in the oven. Leave it alone. You don't need to add butter, baste it, or do anything. Roast it until it's done, 50 to 60 minutes.   Remove chicken from pan and let rest for 15 minutes before serving.  


The beauty of having to do absolutely nothing to the chicken while it roasts for an hour, is it gives you plenty of time to prepare other stuff.  First thing I did was throw together some salads? Why? because that way, If the chicken is being a turkey and taking longer than it needs to, people have something to eat. And when trying to impress the husband's boss, you better not leave him hungry.  I didn't put dressing on the salad till the last possible second, but other than that, they were cooked, done, and out of the way.  And colorful and pretty!

Salads put aside, it was time to start on the sweet potatoes. Initially I was going to grill the potatoes with the veggies, but due to unforseen circumstances (i.e. Kate messed up) I ended up mashing them.  I used white sweet potatoes, skim milk, chicken stock, salt, pepper, cayenne pepper, cinnamon, and nutmeg to make things nice and flavorful.  


So first, I cut up the sweet potato, and boiled until just tender.  Next, drained the water out  of the pan, added the mixture of chicken stock, milk, and spices, and put everything on the back burner on low, stirring occasionally, using a fork to mash the potatoes as they continued to cook in the liquid and absorb the chicken stock and spice flavor. Pretty simple. Maybe not the most beautiful side dish, but super tasty and tastes really good with all the nice juices that run out of the chicken. 


Once all the potatoes were done and the chicken was resting, I went ahead and grilled the vegetables.  Being all organized and stuff, I had already cut them into relatively even sized pieces.  You can grill pretty much anything, I just went with what I had on hand that I thought would taste good with chicken.


Grilling vegetables, especially when cut this small, goes pretty quickly.    Once the chicken was out, I heated the grill pan till nice and hot, and lightly coated it in pan spray.  You can use regular oil too.  You just want a really nice, light coat of oil so nothing sticks.


It is important not to crowd the pan so I worked in small batches. If you haven't tried grilled asparagus, do so. It is one of the best ways to prepare asparagus that doesn't involve copious amounts of bacon.


So with the veggies grilled, and the chicken all nice and rested, I plated everything up. I used a nice big platter with slightly raised edges, as the chicken was pretty juicy.  First, I put the grilled veggies on the plate, lightly salted them, and drizzled them in good balsamic vinegar, leaving a nice spot in the middle of the plate for the chicken.

Next the chicken went down on the plate.  Sometimes I also put the mashed potato or sweet potato or rice on the plate, but this time I did it on the side.  Ok, I forgot.  But no matter, It was still very good.


And there you have it, Ladies and Gentlemen, a good meal to impress whoever you feel the need to impress. . . Or just to make so that you have leftover chicken to turn into chicken salad or whatever.

Sunday, May 9, 2010

Baking Bliss

When it came time to to figure out what to give my mom for mothers day, I thought back to what I've given her over the years, and what she's like the best.  I realized that she's always loved homemade gifts the best, so I figured I'd bake her something delicious, and send it along with some nice tea.  My mom's tea addiction may rival my coffee addiction--or explain where I got it.

I decided that a couple of kinds of cookies would be a great gift, especially if they went nicely with tea.  After a little bit of deliberation, I settled on two types--ginger cookies and linzer cookies.  Both travel well and taste good with tea.  To make sure they stayed fresh for the long journey from LA to Chicago, I packed them in glass jars.  Not only do they keep the cookies fresh, they look pretty!


In the jar on the left--Ginger cookies.  In the jar on the right--Linzer cookies.  We're gonna start with the ginger cookies.

Orange-molasses spice cookies- Adapted from Dorie Greenspan's Baking:From my home to yours.  A fantastic cookbook if you haven't seen it.

2 1/2 cups all-purpose flour
1 3/4 tsp baking soda
2 tsp ginger
1 tsp cinnamon
1/4 tsp ground allspice
1/4 tsp ground cloves
1/4 tsp coarsely ground black pepper
1/2 tsp salt
1 1/2 (12 tablespoons) sticks unsalted butter, softened
1 cup brown sugar
1/2 cup molasses (not blackstrap)
1 large egg


For rolling
3/4 cup sugar
zest of one large orange


1. Whisk together the flour, soda, spices, and salt. In another bowl, or in a stand mixer fitted with the paddle attachment, beat the butter, sugar, and molasses. Add the egg and beat 1 minute more. Blend in the flour mixture until you have a soft dough. It will seem softer than most cookie dough. That's just fine.


2. Divide in half; wrap and freeze for 30 minutes.

3. While freezing, make the orange sugar-- either in a food processor or just on a cutting board with a bench scraper or knife, work the zest of one large orange into 3/4 cup of sugar until it is a pretty sunshine-y yellow color and very fragrant.


4. Shape teaspoonfuls into balls; roll in sugar and orange zest mixture. Place 2 inches apart on a parchment-lined baking sheet.
 

5. Bake at 350°F for 9 to 11 minutes, until flattened and crackle-topped. Cool.


While I said above to cool the cookies, They're totally delicious warm and fresh out of the oven.  I'm careful with what I eat but the smell was so overwhelming that I just HAD to have one. So worth it.   And while they're fantastic with tea, they're also delicious with coffee or milk, and extra special as the outsides of an ice cream sandwich.  If jarring them up to ship, or just to keep in your own cookie jar, let them cool completely first. Trust me. If not you get a clumpy, sticky mess in your jar.  I knew better. I did not get a clumpy sticky mess.


Linzer Cookies-- Also adapted from Dorie Greenspan's Baking: From My Home to Yours because it's such a wonderful book, and, well, I already had it out.


1 1/2 cups finely ground almonds
1 1/2 cups all-purpose flour
1 1/2 teaspoons ground cinnamon
1/4 teaspoon salt
1/4 teaspoon ground cloves
1/8 tsp fresh grated nutmeg
1 large egg
2 teaspoons almond extract
1 stick (8 tablespoons) unsalted butter, at room temperature
1/2 cup sugar

1/2 cup good raspberry jam
Powdered sugar


1- Whisk together the ground nuts, flour, cinnamon, salt, and cloves. Using a fork, stir the egg and extract together in a small bowl.

2-Working with a stand mixer fitted with the paddle attachment, or with a hand mixer in a large bowl, beat the butter and sugar together at medium speed until smooth, about 3 minutes, scraping down the bowl as needed.


3. Add the egg mixture and beat for 1 minute more. Reduce the speed to low and add the dry ingredients, mixing only until they disappear into the dough. Don’t work the dough too much once the flour is incorporated. If the dough comes together but some dry crumbs remain in the bottom of the bowl, stop the mixer and finish blending the ingredients with a rubber spatula or your hands.


4. Divide the dough in half. Working with one half at a time, put the dough between two large sheets of wax paper, parchment paper (my paper of choice) or plastic wrap. Using your hands, flatten the dough into a disk, then grab a rolling pin and roll out the dough, turning it over frequently so that the paper doesn’t cut into it, until it is about 1/4-inch thick. Leave the dough in the paper and repeat with the second piece of dough.


5. Transfer the wrapped dough to a baking sheet or cutting board (to keep it flat) and refrigerate or freeze it until it is very firm, about 2 hours in the refrigerator or 45 minutes in the freezer. It was firm enough that I could pick up the dough on the paper and have it stay hard-- kinda the way frozen puff pastry does. The rolled-out dough can be wrapped airtight and stored in the refrigerator for up to 3 days or the freezer for up to 2 months. Just thaw the dough enough to cut and go from there.


6. Center a rack in the oven and preheat the oven to 375° F. Line two baking sheets with parchment or silicone mats.

7. Peel off the top sheet of paper from one piece of dough and, using a 2-inch round cookie cutter—a scalloped cutter is nice for these—cut out as many cookies as you can. If you want to have a peekaboo cutout, use a small cutter or the round end of a piping tip to cut out a very small shapes from the centers of half the cookies. I found that cutting the peekaboo shape before cutting the large one worked better. Otherwise, the perfect rounds would morph a little and not fit exactly on the bases.Transfer the rounds to the baking sheets, leaving a little space between the cookies. Set the scraps aside—you can combine them with the scraps of the second disk and roll out and cut more cookies.


8. Bake the cookies one sheet at a time for 11 to 13 minutes, or until the cookies are lightly golden, dry, and just firm to the touch. Transfer the cookies to a rack to cool to room temperature.  Aren't they cute?

9. Repeat with the second disk of dough, making sure to cool the baking sheets between batches. Gather the scraps of dough together, press them into a disk, roll them between sheets of waxed paper and refrigerate until firm, then cut and bake.


10. turn half of the cookies flat side up and place about 1/2 teaspoon jam in the center of each cookie; dust the top halves with confectioner's sugar before sandwiching--that way, you end up with the nice raspberry jam showing through the hole, instead of powdered sugar.sandwich with the remaining cookies.

 Linzer cookies are a bit more delicate than ginger cookies.  Because of this, I had to be more careful when packing them.  While the ginger cookies were fine hanging free in the jar, these needed padding. I padded the jar with parchment paper so they wouldn't shift too terribly much in transit,  stacked them carefully in the jar, and padded around the cookies.


While I'm focusing more on the healthy cooking right now, it was great to have an excuse to cook something totally magically delicious.  I'm going to be doing more baking--it made me happy, so it's time to hunt down some high quality taste-testers to eat baked goods so I don't.

Happy Mother's Day Eileen!--and all the other moms out there.